Incoming
Inspection Log
|
Step 1 |
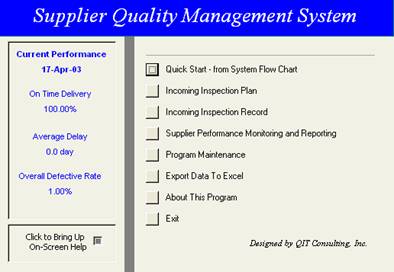
In the main program menu, click Incoming Inspection Record button to start entering incoming inspection results. |
|
|
Step 2 |
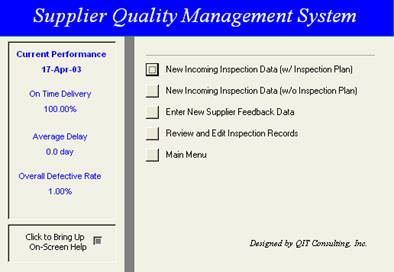
The program provides two ways of data entering. 1) Start from Inspection Plan 2) Start without Inspection Plan. To start from Inspection Plan, from program menu, click New Incoming Inspection Data (w/Inspection Plan)
Note: To simplify the incoming inspection process, user can bypass the planning section, and start entering inspection results directly. |
|
|
Step 3 |
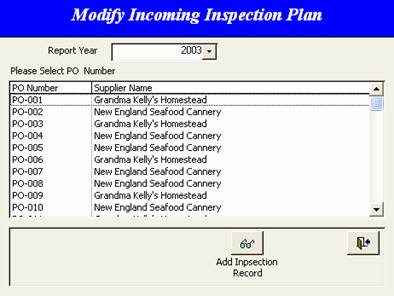
Start from Inspection Plan Click New Incoming Inspection Data (w/Inspection Plan), then click the PO Number, and then click Add Inspection Record button to bring up data entry form.
Note: Select different year from the drop-down list to review the PO Numbers from different year. |
|
|
Step 4 |
To start data entry without Inspection Plan, from system menu, click New Incoming Inspection Data (w/o Inspection Plan), the data entry form will be brought up. |
|
|
Step 5 |
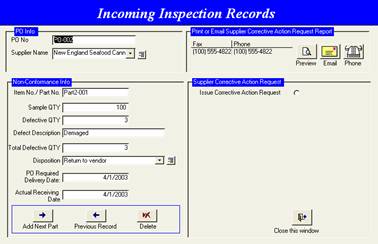
Enter PO and inspection data accordingly. Click the button next to Supplier Name to add new supplier.
Use Add New Part button to add more inspection records for different parts in this PO. |
|
|
Step 6 |
To modify records, close the Incoming Inspection Records window, and go back to main menu.
Click Review and Edit Inspection Record button to modify incoming inspection records and SCARF info. |
|
|
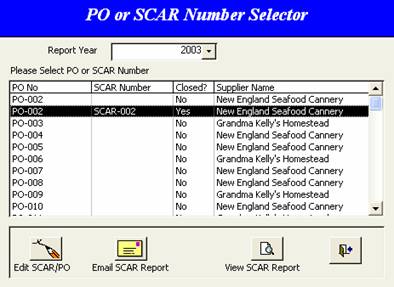
Step 7 |
Select the PO Number that user want to modify.
Click Edit to modify the report.
Click View Report or Email to print or email SCARF report directly. . |
|